- Home
- Promotion
-
Products
-
CISCO
-
Switches
- Cisco Nexus 9000 Series
- Cisco Nexus 7000 Series
- Cisco Nexus 5000 Series
- Cisco Nexus 3000 Series
- Cisco Nexus 2000 Series
- Cisco Catalyst 9600 Series
- Cisco Catalyst 9500 Series
- Cisco Catalyst 9400 Series
- Cisco Catalyst 9300 Series
- Cisco Catalyst 9200 Series
- Cisco Catalyst 6800 Series
- Cisco Catalyst 6500 Series
- Cisco Catalyst 4900 Series
- Cisco Catalyst 4500 Series
- Cisco Catalyst 3850 Series
- Cisco Catalyst 3750 Series
- Cisco Catalyst 3650 Series
- Cisco Catalyst 3560 Series
- Cisco Catalyst 2960 Series
- Cisco Catalyst 2950 Series
- Cisco Catalyst 1000 Series
-
Routers
- Cisco Router ASR 9000 Series
- Cisco Router ASR 5000 Series
- Cisco Router ASR 1000 Series
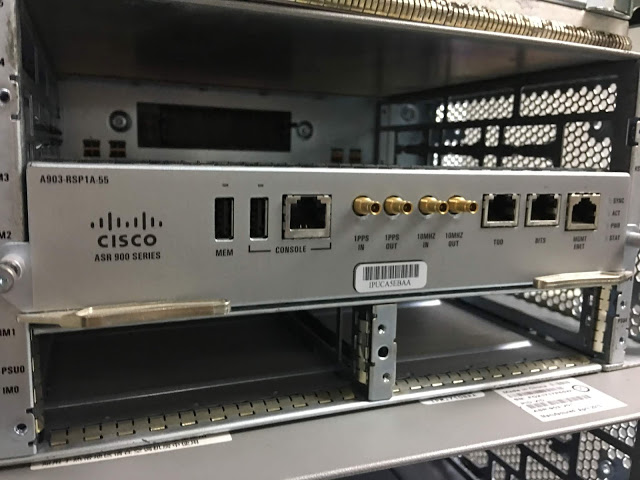
- Cisco Router ASR 900 Series
- Cisco Router ISR 4000 Series
- Cisco Router ISR 3900 Series
- Cisco Router ISR 3800 Series
- Cisco Router ISR 2900 Series
- Cisco Router ISR 2800 Series
- Cisco Router ISR 1900 Series
- Cisco Router ISR 1800 Series
- Cisco Router ISR 1100 Series
- Cisco Router ISR 800 Series
- Cisco Router ISR 900 Series
- Cisco Router 12000 Series
- Cisco Router 10000 Series
- Cisco Router 8000 Series
- Cisco Router 7600 Series
- Cisco Router 7200 Series
- Cisco Catalyst 8500 Series
- Cisco Catalyst 8300 Series
- Cisco Catalyst 8200 Series
- Cisco Industrial Routers
- Firewalls & Security
-
Wireless AP & Controllers
- Cisco 1410 Access Point
- Cisco 1040 Access Point
- Cisco 1240 Access Point
- Cisco 1260 Access Point
- Cisco 1310 Access Point
- Cisco 521 Access Point
- Cisco 600 Access Point
- Cisco 1130 Access Point
- Cisco 1140 Access Point
- Cisco 700 Access Point
- Cisco 3600 Access Point
- AP and Bridge Accessories
- Cisco 2700 Access Point
- Cisco 1520 Mesh Access Point
- Cisco 3500 Access Point
- Cisco 1530 Outdoor Access point
- Cisco 1550 Access Point
- Cisco 1700 Access Point
- Cisco 1600 Access Point
- Cisco Antenna 2.4 5 5.8 GHz
- Cisco 3700 Access Point
- Cisco 2600 Access Point
- Cisco 1570 Outdoor Access Point
- Cisco Aironet 1562I Outdoor Access Point
- Cisco Catalyst IW6300 Series Heavy Duty Access Points
- Cisco Catalyst 9100 WiFi 6 Access Point
- Cisco 4800 Access Point
- Cisco 2800 Access Point
- Cisco 3800 Access Point
- Cisco 1850 Access Point
-
Interfaces & Modules
- Cisco Nexus 9000 Switch Modules
- Cisco Nexus 7000 Switch Modules
- Cisco Nexus 5000 Switch Modules
- Cisco Nexus 3000 Switch Modules
- Cisco Catalyst 9000 Switch Modules
- Cisco Catalyst 8000 Series Edge Platforms Modules
- Cisco ISR 4000 Router Modules
- Cisco ASR 1000 Router Modules
- Cisco 8000 Series Routers Modules
- Cisco 7600 Router Modules
- Cisco 7200 Router Modules
- Cisco 6800 Switch Modules
- Cisco 6500 Switch Modules
- Cisco 4500 Switch Modules
- Cisco Router ISR G2 SM ISM Modules
- Cisco NM NME EM Network Modules
- Cisco Wireless Services Module
- Cisco Controller Modules
- Cisco Router AIM Modules
- Cisco Router EHWIC WAN Cards
- Cisco Router VWIC2 VWIC3 Cards
- Cisco IE Switch Modules
- Cisco Firewalls Modules
- PVDM Voice/FAX Modules
- Cisco Virtual Interface Card
- Cisco WAN Interface Cards
- Fiber Transceivers
-
Memory & Flash
-
IP Phone & Telepresence
-
Optical Networking
-
Power Supply & Fan Tray
-
Other Products
-
Switches
-
HUAWEI
-
Switches
- Huawei S12700 Series
- Huawei S9700 Series
- Huawei S9300 Series
- Huawei S7700 Series
- Huawei S6700 Series
- Huawei S6300 Series
- Huawei S5700S Series
- Huawei S5700 Series
- Huawei S5300 Series
- Huawei S3700 Series
- Huawei S3300 Series
- Huawei S2700 Series
- Huawei S2300 Series
- Huawei S1700 Series
- Huawei S6800 Series
- Huawei Data Center Switches
-
Other Products
-
Interface Modules
-
Wireless AP & Controllers
-
Routers
-
Firewalls
-
Switches
- A10 Networks
- H3C
- Juniper
- F5
- FortiGate
-
IBM
-
DELL
-
Lenovo
- Aruba
- Palo Alto Networks
- MikroTik
- Quanta
-
Others
-
CISCO
-
Switches
- Cisco Nexus 9000 Series
- Cisco Nexus 7000 Series
- Cisco Nexus 5000 Series
- Cisco Nexus 3000 Series
- Cisco Nexus 2000 Series
- Cisco Catalyst 9600 Series
- Cisco Catalyst 9500 Series
- Cisco Catalyst 9400 Series
- Cisco Catalyst 9300 Series
- Cisco Catalyst 9200 Series
- Cisco Catalyst 6800 Series
- Cisco Catalyst 6500 Series
- Cisco Catalyst 4900 Series
- Cisco Catalyst 4500 Series
- Cisco Catalyst 3850 Series
- Cisco Catalyst 3750 Series
- Cisco Catalyst 3650 Series
- Cisco Catalyst 3560 Series
- Cisco Catalyst 2960 Series
- Cisco Catalyst 2950 Series
- Cisco Catalyst 1000 Series
-
Routers
- Cisco Router ASR 9000 Series
- Cisco Router ASR 5000 Series
- Cisco Router ASR 1000 Series
- Cisco Router ASR 900 Series
- Cisco Router ISR 4000 Series
- Cisco Router ISR 3900 Series
- Cisco Router ISR 3800 Series
- Cisco Router ISR 2900 Series
- Cisco Router ISR 2800 Series
- Cisco Router ISR 1900 Series
- Cisco Router ISR 1800 Series
- Cisco Router ISR 1100 Series
- Cisco Router ISR 800 Series
- Cisco Router ISR 900 Series
- Cisco Router 12000 Series
- Cisco Router 10000 Series
- Cisco Router 8000 Series
- Cisco Router 7600 Series
- Cisco Router 7200 Series
- Cisco Catalyst 8500 Series
- Cisco Catalyst 8300 Series
- Cisco Catalyst 8200 Series
- Cisco Industrial Routers
- Firewalls & Security
-
Wireless AP & Controllers
- Cisco 1410 Access Point
- Cisco 1040 Access Point
- Cisco 1240 Access Point
- Cisco 1260 Access Point
- Cisco 1310 Access Point
- Cisco 521 Access Point
- Cisco 600 Access Point
- Cisco 1130 Access Point
- Cisco 1140 Access Point
- Cisco 700 Access Point
- Cisco 3600 Access Point
- AP and Bridge Accessories
- Cisco 2700 Access Point
- Cisco 1520 Mesh Access Point
- Cisco 3500 Access Point
- Cisco 1530 Outdoor Access point
- Cisco 1550 Access Point
- Cisco 1700 Access Point
- Cisco 1600 Access Point
- Cisco Antenna 2.4 5 5.8 GHz
- Cisco 3700 Access Point
- Cisco 2600 Access Point
- Cisco 1570 Outdoor Access Point
- Cisco Aironet 1562I Outdoor Access Point
- Cisco Catalyst IW6300 Series Heavy Duty Access Points
- Cisco Catalyst 9100 WiFi 6 Access Point
- Cisco 4800 Access Point
- Cisco 2800 Access Point
- Cisco 3800 Access Point
- Cisco 1850 Access Point
-
Interfaces & Modules
- Cisco Nexus 9000 Switch Modules
- Cisco Nexus 7000 Switch Modules
- Cisco Nexus 5000 Switch Modules
- Cisco Nexus 3000 Switch Modules
- Cisco Catalyst 9000 Switch Modules
- Cisco Catalyst 8000 Series Edge Platforms Modules
- Cisco ISR 4000 Router Modules
- Cisco ASR 1000 Router Modules
- Cisco 8000 Series Routers Modules
- Cisco 7600 Router Modules
- Cisco 7200 Router Modules
- Cisco 6800 Switch Modules
- Cisco 6500 Switch Modules
- Cisco 4500 Switch Modules
- Cisco Router ISR G2 SM ISM Modules
- Cisco NM NME EM Network Modules
- Cisco Wireless Services Module
- Cisco Controller Modules
- Cisco Router AIM Modules
- Cisco Router EHWIC WAN Cards
- Cisco Router VWIC2 VWIC3 Cards
- Cisco IE Switch Modules
- Cisco Firewalls Modules
- PVDM Voice/FAX Modules
- Cisco Virtual Interface Card
- Cisco WAN Interface Cards
- Fiber Transceivers
-
Memory & Flash
-
IP Phone & Telepresence
-
Optical Networking
-
Power Supply & Fan Tray
-
Other Products
-
Switches
-
HUAWEI
-
Switches
- Huawei S12700 Series
- Huawei S9700 Series
- Huawei S9300 Series
- Huawei S7700 Series
- Huawei S6700 Series
- Huawei S6300 Series
- Huawei S5700S Series
- Huawei S5700 Series
- Huawei S5300 Series
- Huawei S3700 Series
- Huawei S3300 Series
- Huawei S2700 Series
- Huawei S2300 Series
- Huawei S1700 Series
- Huawei S6800 Series
- Huawei Data Center Switches
-
Other Products
-
Interface Modules
-
Wireless AP & Controllers
-
Routers
-
Firewalls
-
Switches
- A10 Networks
- H3C
- Juniper
- F5
- FortiGate
-
IBM
-
DELL
-
Lenovo
- Aruba
- Palo Alto Networks
- MikroTik
- Quanta
-
Others
-
CISCO
- Accessories
- Blog
-
About us
About Linknewnet
Selling mid-to-high-end network products:Switch/Router/Firewall/Line Card and various accessories from mainstream brands such as Cisco, HUAWEI, H3C, Juniper, Brocade, HP, F5, FortiGate, A10 Networks, etc.
-
Phone :
+86 18954776148
- Mail :
- Shop :
-
Phone :
-
Contact us
Contact us
contact us if there's a model not in our website, our sourcing team will spare no effort working on it with lowest price and best service.
-
WhatsApp +86 18954776148
-
Phone
+86 18954776148
-
Mail
-
Address
3/F, Building B, 312 Jihua Road, Debaoli Industrial Zone, Bantian, Shenzhen, Longgang District, China
-
- Inquiry 0